Train Sim World 2 - How to Operate the GP38-2 or the SD40-2
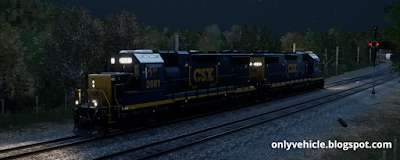
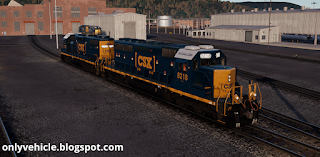
Train Sim World 2 is a train simulator game. The game seems very well designed and made. The game consists of three routes on which we can operate trains. The most popular among the three is Sand Patch Grade. This route is located in America. We are able to drive trains belonging to CSX, a rail operating company in America. I also have most of my experience playing the game in this route. This game is very nice and interesting.
Initial experience:
Initially while playing the game, I had to go through several hardships. The guidance provided by the AI to operate trains in the absolute worst. Following its advice is going to lead you nowhere. I had to learn to just be able to move trains with random less known tutorials on YouTube. I compiled them altogether and tried to operate the locomotive. Finally, to my great surprise, the train moved. Things like slowing down the train, bringing it to a stop, etc. were learned by me by trying different sorts of random things. To have a smooth experience, I bring forth to you my compilation on how to operate the GP38-2 and the SD40-2 locomotives from Sand Patch Grade.
Things to keep in mind:
- Never trust the AI's instructions. Verify all the controls yourself. If the AI prompts you to do something before you can do anything, just do as it says and revert the controls back to your desired state.
- The GP38-2 locomotives and the SD40-2 locomotives are very similar in appearance. They also have a similar cockpit. The ways to operate any of these locomotives are also the same. Controls on both of these locomotives are located in the same place.
- With regard to the difference in performance between these two locomotives, the SD40-2 is comparatively more stronger than the GP38-2. You can check the specifications of each locomotive within the game.
- There is also a third type of locomotive in Sand Patch Grade. This is called an AC4400cw. This locomotive is comparatively larger and can be easily differentiated from the other two.
- To tell the difference between a GP38-2 and an SD40-2, just observe the number of wheels in each bogie of the locomotives. The GP38-2 would have 4 wheels in each bogie while the SD40-2 would have 6.
- You have tutorials within the game which tell you how to operate a single locomotive. In general gameplay, you have tandems (two) locomotives attached to each other facing opposite directions. You will have to operate them in a different way which the tutorials do not explain.
Operation of the GP38-2 or the SD40-2:
Types of locomotives in a tandem: For a tandem formed by two locomotives each facing opposite directions, the one which you will be operating is called the lead locomotive. The one which trails along is called the trailing locomotive. During normal operation in real life, two locomotives are used together for extra traction or for safety in case one of them fails. This game is made as realistic as possible.
Things to setup:
Lead locomotive:
- Cab Lights - ON or OFF (As required) (Located at the top of the cockpit of the locomotive)
- Number Lights Front - ON (Optional) (Located in the top panel behind the engineer's seat)
- Number Lights Rear - ON (Optional) (Located in the top panel behind the engineer's seat)
- Headlight Control - Controlling with Unit Coupled at Long Hood End (Optional) (Located in the top panel behind the engineer's seat)
- Radio and HOTD - ON (Optional) (Located inside the fuse cabinet below the top panel behind the engineer's seat)
- Engine Run - ON
- Generator Field - ON
- Control and Fuel Pump - ON
- Headlight Front - Bright
- Reverser - Neutral
- Throttle - Idle
- Dynamic Brake - OFF
- Headlights Rear - Bright
- Ditch Lights - ON (Optional)
- Step Lights - ON
- Gauge Lights - ON (Optional)
- Lead Axle Sand - OFF
- Independent Brake - Full Service
- Automatic Brake - Release
- Cut-Off Valve - Freight
- MU-2A Valve - Lead or Dead
Trailing Locomotive:
- Cab Lights - ON or OFF (As required) (Located at the top of the locomotive)
- Number Lights Front - ON (Optional) (Located in the top panel behind the engineer's seat)
- Number Lights Rear - ON (Optional) (Located in the top panel behind the engineer's seat)
- Headlight Control - Controlling with Unit Coupled at Long Hood End (Optional) (Located in the top panel behind the engineer's seat)
- Radio and HOTD - OFF (Optional) (Located inside the fuse cabinet below the top panel behind the engineer's seat)
- Engine Run - OFF
- Generator Field - OFF
- Control and Fuel Pump - OFF
- Headlight Front - OFF
- Reverser - Neutral
- Throttle - Idle
- Dynamic Brake - OFF
- Headlights Rear - OFF
- Ditch Lights - ON (Optional)
- Step Lights - ON
- Gauge Lights - OFF (Optional)
- Lead Axle Sand - OFF
- Independent Brake - Release
- Automatic Brake - Handle Off
- Cut-Off Valve - Cut-Out
- MU-2A Valve - Trail 6 or 26
Single locomotive:
For operating a single locomotive, setup is done in the same way as described above for the lead locomotive.
Operation:
Proceed with the steps below after doing the setup work as said above:
- Jump into the engineer's seat of the operational locomotive. Note that there is no need to jump between locomotives in the tandem for moving in both directions. You should move forward or backward in the same lead locomotive. Do not change the setup as did above. If necessary, you can switch roles between the locomotives in the tandem.
- Change the reverser to Forward or Reverse for moving forward or backward.
- Give two sounds of the horn (Game recommends you to do so. If done, points are awarded.).
- Increase throttle to Notch 1.
- Bring Independent Brake to Bail Off and then Release
- After this is done, your lead locomotive should start moving.
- To bring the locomotive to a stop, set Independent brake to about 30% or higher if required.
- To slow down the locomotive while moving downhill, set the Throttle to Idle. Then, set Dynamic Brake to a value as required.
Conclusion:
These steps should have helped you to get started with atleast getting the train moving in Train Sim World 2. If you have any further doubts, leave them in the comments below. I will see them and help you out.


0 Comments